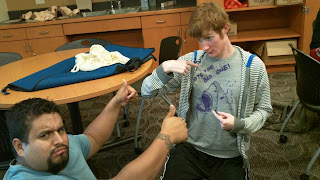
Unconscious Choking Video
Unconscious choking
1. give resucue breaths
2. if rescue breaths dont go in, retilt head
3. give 30 compressions
4. check for object, scoop cheek to cheek
5. give rescue breaths
6. if no signs of life, give CPR
7. if signs of life, monitor condition and wait for help
Thursday, October 14, 2010
Crash Dummies/unconscious choking
Unconscious choking, Compare and Contrast
In the following video, all steps of the process are identical to what we have been practicing except for one misstep. In the video, the airway of the victim is not being checked for expelled obstruction after compressions are given. Instead, series of 2 breathes and 30 compressions are given until an object visibly "pops out" of the mouth or the victim vomits at which point the victim is put into the safety position and then reassessed for signs of life.
http://www.youtube.com/watch?v=X2Wc-qFo1Ow
Wednesday, October 13, 2010
Team TCTD Concious Child Choking
Conscious Child Choking (Start at 1:52 End at 2:45)
Differences:
The flight attendant never identifies herself or her training
She encourages the child to cough before giving any treatment
Sits child down while giving stomach trusts
She bends the child over her knee while performing back blows
She encourages the child to cough while she is giving care
Thursday, October 7, 2010
Team Awesome - Anatomical Splint (Femur)
First Aid Super Heroes
Obtain consent and tell the victim your level of training

Slide bandages under the ankle
Place boards on both sides of injured area
Tie the split above and below the injured area

TCTD: Sling (Soft Splint)
Tell the victim who you are/ level of training
Obtain consent
Have victim support the injured arm/ shoulder
Slide the triangular bandage under the forearm to adjacent shoulder
Obtain consent
Have victim support the injured arm/ shoulder
Slide the triangular bandage under the forearm to adjacent shoulder
Pull the other end of bandage over the forearm to the top of the shoulder
First Aid 4
Rigid Splint for forearm
1.Obtain Consent.
2.Tell the victim who you are/level of training.
3.Have victim support the injured limb.
4.Place board under forearm and have the victim hold it in place.
5.Place gauze under the palm of the victim.
6.Tie the splint above and below the injured area.
1.Obtain Consent.
2.Tell the victim who you are/level of training.
3.Have victim support the injured limb.
4.Place board under forearm and have the victim hold it in place.
5.Place gauze under the palm of the victim.
6.Tie the splint above and below the injured area.
Apple Jacks and Janes
Soft Splint(Ankle)
IM HURT, IM HURT!!!!!
IM HURT, IM HURT!!!!!
Obtain Consent (Ask if they want help...)
TELL the victim who you are/level of training
Have the victim stay SEATED with legs extended...
FOLD a thick blanket...
WRAP the blanket around the ankle
SECURE the blanket above and below the injury
Well treated.....
911 may need to be called......
Crash Dummies - Forearm Impaled Object
Obtain Consent
Tell the victim who you are/level of training
Have the victim hold the gauze in place
Use an elastic roller bandage to secure the gauze
Subscribe to:
Comments (Atom)


